Introduction
Installing an FRP walkway platform is a straightforward process when you have the right knowledge, tools, and preparation. Whether you are adding a corrosion-resistant walkway to a chemical plant, a lightweight access path for a water treatment facility, or a durable platform for an offshore installation, understanding the correct FRP walkway platform installation procedure ensures safety, longevity, and optimal performance.
This step-by-step guide walks you through the entire FRP walkway platform installation process — from site preparation and material selection to final inspection and maintenance. We cover the tools you will need, the key installation steps, safety precautions, and answers to common questions such as how long installation takes and whether you can do it yourself. By the end, you will have a complete understanding of how to install an FRP walkway platform correctly and efficiently.
What Is an FRP Walkway Platform?
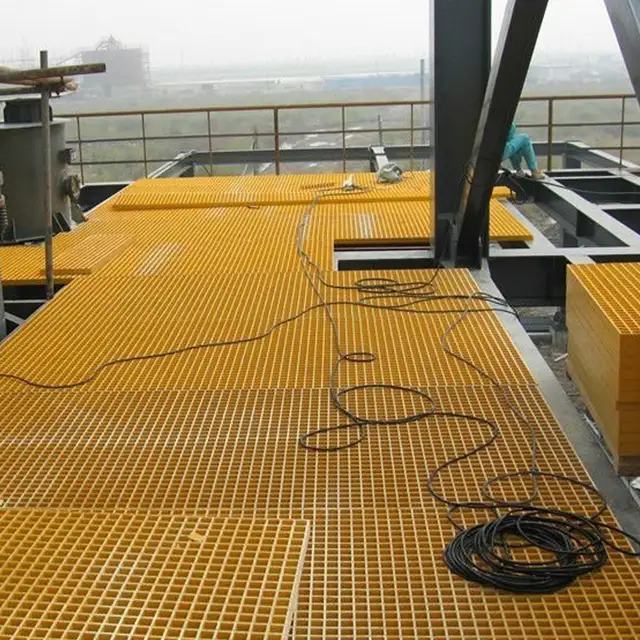
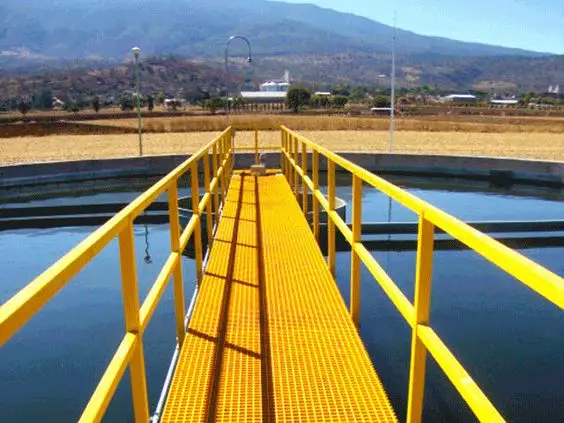
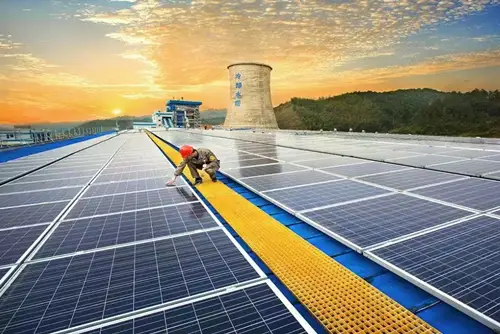
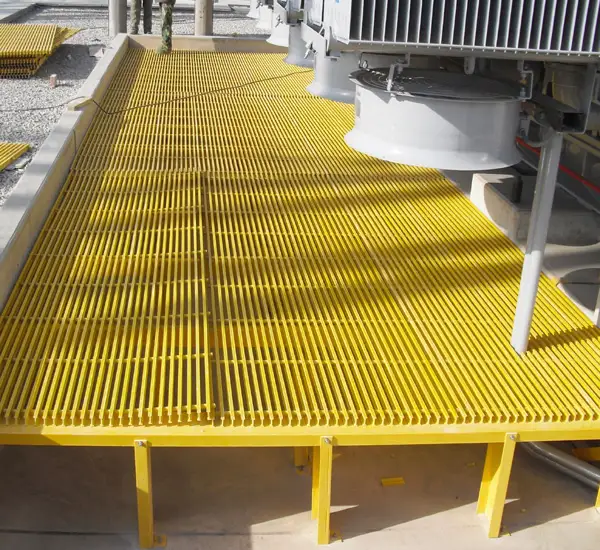
An FRP (Fiberglass Reinforced Plastic) walkway platform is a prefabricated structural system made from fiberglass and resin materials. These platforms are designed to provide safe pedestrian access in environments where traditional materials like steel or wood would corrode, rot, or degrade quickly. FRP walkway platforms are commonly used in industrial facilities, marine environments, chemical processing plants, wastewater treatment plants, and commercial buildings.
Key Benefits of FRP Walkway Platforms
- Corrosion Resistance: FRP does not rust or corrode, making it ideal for harsh chemical and marine environments.
- Lightweight: FRP is approximately 75% lighter than steel, reducing transportation and installation labor costs.
- High Strength-to-Weight Ratio: Despite being lightweight, FRP walkway platforms offer exceptional structural strength.
- Low Maintenance: Unlike wood or steel, FRP requires no painting, sealing, or special coatings.
- Slip Resistance: FRP grating surfaces can be manufactured with integrated grit for enhanced traction.
- Non-Conductive: FRP is electrically non-conductive, providing safety in electrical environments.
When exploring frp walkway platform ideas for your facility, consider design features such as integrated cable management, multiple access levels, or modular expansion capabilities. These inherent material properties influence every step — from how you handle the panels to the fastening methods you use. For complete projects, following an FRP platform walkway installation guide ensures consistent and code-compliant results.
Tools and Materials Required for FRP Walkway Platform Installation
Before beginning your FRP walkway platform installation, gather all necessary tools and materials. Having everything on hand beforehand prevents costly delays and ensures the installation proceeds smoothly.
Essential Tools
| Tool Category | Specific Tools | Purpose |
|---|---|---|
| Cutting Tools | Circular saw with carbide-tipped blade, jigsaw, angle grinder | Cutting FRP panels and grating to size |
| Drilling Tools | Power drill with carbide-tipped drill bits, impact driver | Drilling holes for fasteners and connections |
| Measuring Tools | Tape measure, chalk line, level, square, laser distance measurer | Layout, alignment, and spacing verification |
| Fastening Tools | Wrenches, socket set, torque wrench, screwdrivers | Securing bolts, nuts, and clips |
| Safety Equipment | Safety glasses, dust mask, work gloves, hard hat, steel-toe boots | Personal protection during cutting and assembly |
| Lifting Equipment | Forklift or crane (for large panels), panel lifters, hoists | Moving and positioning heavy FRP components |
Materials Checklist
- FRP walkway platform kit or custom panels: grating panels, support beams, handrails, toe plates
- Stainless steel or galvanized fasteners: bolts, nuts, washers, clips (must be compatible with FRP to prevent galvanic corrosion)
- Support structure materials: steel or FRP I-beams, channels, or tube supports
- Adhesive or sealant: UV-resistant polyurethane or silicone sealant for joints
- Bearing plates and shims: for leveling the support structure
- Anti-slip grit tape or additional grit coating (if not pre-applied)
- Touch-up resin or gel coat for field-cut edges
Using a complete frp walkway platform kit simplifies procurement since all pre-cut panels and matching fasteners arrive together. However, custom projects may require sourcing components separately.
Site Preparation for FRP Walkway Platform Installation
Proper site preparation is critical for a successful FRP walkway platform installation. Rushing this phase can lead to misalignment, uneven surfaces, and structural issues that are difficult to correct later.
Measuring and Planning the Layout
Begin by measuring the installation area accurately. Use a laser distance measurer or tape measure to record the length, width, and any obstructions such as pipes, equipment, or structural columns. Transfer these measurements to a layout drawing that shows:
- Overall platform dimensions and shape
- Support beam locations and spacing (typically 18–24 inches on center for standard duty)
- Handrail post locations
- Access points, gates, or ladders
- Penetrations for pipes or conduits
Mark the layout on the ground or existing structure using chalk lines or marking paint. Double-check all measurements before proceeding. A common mistake is failing to account for the overlap required where FRP grating panels meet, so include at least 1 inch of bearing surface at each support point.
Ground Preparation and Foundation Work
For ground-level installations, the foundation must be level, compacted, and capable of supporting the design load. Follow these steps:
- Clear the area: Remove vegetation, debris, and any soft or unstable soil.
- Excavate and compact: Excavate to the required depth and compact the subgrade to at least 95% standard proctor density.
- Add base material: Spread and compact a 4–6 inch layer of crushed stone or gravel for drainage.
- Pour concrete footings or piers: At each support column location, pour concrete footings sized according to the structural engineer specifications. Allow concrete to cure for at least 48 hours before loading.
- Install anchor bolts: Set anchor bolts in the wet concrete at precisely measured locations to match the support beam base plates.
For elevated installations (installing onto existing steel or concrete structures), ensure the host structure is sound and rated for the additional load. Use shims and leveling plates where necessary to create a flat installation surface.
For those exploring frp walkway platform ideas, the site preparation phase is also the best time to consider integrated features like cable tray supports, equipment stands, or multiple access levels — designing these into the layout from the start saves significant rework later.
Step-by-Step FRP Walkway Platform Installation Guide
This is the core of the FRP platform walkway installation guide. Follow these five steps in order for a safe, secure, and long-lasting installation.
Step 1: Unbox and Inspect Components
Upon delivery, inspect all FRP components for shipping damage. Check for cracks, delamination, or warping. Verify that all panels, beams, handrails, and fasteners match the bill of materials. Lay out components near the installation area grouped by type. Store FRP materials flat on a clean, dry surface, protected from direct sunlight if they will not be installed immediately.
Step 2: Assemble the Support Structure
Install the primary support beams (FRP I-beams, WF beams, or steel girders) according to your layout plan:
- Position the support beams on the prepared footings or existing structure.
- Use a level to ensure each beam is perfectly horizontal. Shim under base plates with stainless steel shims as needed.
- Bolt the beams to anchor bolts using the supplied fasteners. Torque to manufacturer specifications.
- Install secondary cross-beams or purlins at the specified spacing (typically 18–24 inches on center).
- Check that all beams are in the same plane — any variation greater than 1/8 inch over 10 feet must be corrected with shims before proceeding.
For FRP support beams, drill bolt holes using carbide-tipped drill bits. Do not hammer or force bolts through FRP — this can cause microfractures. Always use stainless steel washers under bolt heads and nuts to distribute clamping force evenly.
Step 3: Install the FRP Grating Panels
FRP grating panels form the walking surface. Handle them carefully to avoid damage:
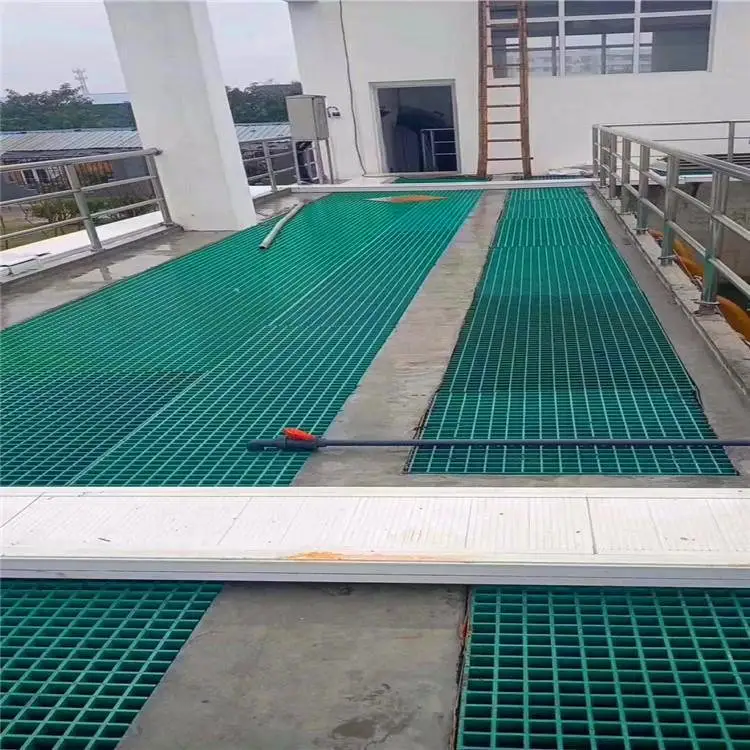
- Position each grating panel onto the support structure, aligning it according to your layout plan.
- Leave a 1/4-inch gap between adjacent panels for thermal expansion and drainage.
- For panels that need field cutting, use a circular saw with a carbide-tipped blade. Cut from the top surface to minimize edge chipping. Seal cut edges with touch-up resin to prevent moisture wicking.
- Ensure every panel rests on at least 1 inch of bearing surface at each support.
Step 4: Secure and Fasten All Components
Proper fastening prevents panel movement and ensures structural integrity:
- Use the specified FRP-compatible fasteners — stainless steel or galvanized, never plain carbon steel.
- Install hold-down clips or saddle clips at each support intersection per manufacturer spacing requirements.
- Torque fasteners to the specified value — overtightening can crush FRP material.
- For grating panels, use two fasteners per support intersection (one on each side of the bearing bar).
- Apply thread-locking compound to fasteners in high-vibration environments.
- Install toe plates at open edges to prevent tools or debris from falling through.
Step 5: Add Handrails and Safety Features
Handrail installation is the final major assembly step and is critical for worker safety:
- Install handrail base flanges or post sockets at the specified intervals (typically every 4–6 feet).
- Insert vertical posts and secure them with the provided fasteners. Check each post for plumb using a level.
- Attach top rails and mid-rails. For FRP handrail systems, use the manufacturer joining brackets and adhesive — do not weld FRP.
- Install a 4-inch high toe board at the base of the railing system where required by safety codes.
- If using a frp walkway platform kit, handrail components are typically pre-drilled and color-coded for easy matching, significantly simplifying this step.
- Add any optional safety features such as self-closing gates, safety harness tie-off points, or anti-slip stair treads.
How Long Does FRP Walkway Platform Installation Take?
The time required for FRP walkway platform installation depends on several factors: the size and complexity of the platform, site accessibility, crew experience, and whether the foundation work is included.
| Platform Size | Crew Size | Estimated Installation Time |
|---|---|---|
| Small platform (up to 100 sq ft) | 2 workers | 1–2 days |
| Medium platform (100–500 sq ft) | 3–4 workers | 2–4 days |
| Large platform (500+ sq ft) | 4–6 workers | 4–8 days |
| Multi-level or complex design | 4–6 workers | 1–3 weeks |
Key factors that affect installation duration include:
- Foundation cure time: Concrete footings require 48–72 hours of curing before loading, which adds 2–3 days to the overall schedule.
- Field modifications: Cutting panels to fit around existing equipment or irregular spaces adds time — typically 15–30 minutes per cut panel.
- Weather conditions: Rain, high winds, or extreme temperatures can delay work, especially when applying adhesives or sealants.
- Site accessibility: Difficult access (narrow corridors, multi-story buildings, remote locations) slows material transport and increases installation time.
- Handrail complexity: Platforms with extensive handrail systems, multiple gates, or custom safety features take longer to assemble.
As a general rule, FRP platforms install faster than equivalent steel structures because FRP is lighter and requires no welding or hot work. A crew experienced with FRP can typically install 150–200 square feet of grating per day, including handrail assembly.
Can You Install FRP Walkway Platforms Yourself or Hire a Contractor?
This is a common question for facility managers and project owners. The answer depends on your experience level, the project complexity, and available resources.
DIY Installation Feasibility
For small, ground-level platforms (under 100 sq ft), a competent DIY team with basic construction skills can handle the FRP walkway platform installation. FRP is more forgiving than steel — it is lighter, requires no welding, and can be cut with standard woodworking tools. However, you should have:
- Experience reading structural drawings and layout plans
- Proficiency with power tools (circular saw, drill, impact driver)
- Ability to lift and maneuver panels (typically 20–40 lbs per panel)
- Knowledge of proper fastener torque and spacing requirements
- Understanding of local building codes and safety regulations
When to Hire a Contractor
For larger, elevated, or structurally complex platforms, hiring an experienced FRP installation contractor is strongly recommended. Consider professional installation when:
- The platform is elevated more than 6 feet above ground level
- The design includes multiple levels, stairs, or complex geometries
- The platform must meet specific OSHA or ANSI safety standards
- The installation is in a hazardous environment (chemical, electrical, or marine)
- You have a tight construction schedule and cannot afford delays
- The platform must be engineered and stamped by a licensed structural engineer
Most FRP manufacturers maintain a network of certified installers who have received factory training on proper handling, cutting, and fastening techniques. Using a certified installer often helps preserve the product warranty.
Do You Need Special Training?
While formal certification is not strictly required to install FRP walkway platforms, special training is highly recommended. Many manufacturers offer training sessions covering:
- Proper cutting techniques to avoid edge damage and delamination
- Correct fastener selection and torque values for FRP materials
- Thermal expansion considerations and gap spacing
- Load rating limits and support spacing requirements
- Safety protocols specific to FRP handling
Even experienced construction crews benefit from a half-day training session before their first FRP installation, as the material behaves differently from steel, wood, or concrete.
Safety Tips for FRP Walkway Platform Installation
Safety should be the top priority during any FRP walkway platform installation. While FRP is safer to work with than steel in many ways (no sharp burrs from welding, no hot work permits required), there are specific hazards to address.
Personal Protective Equipment (PPE)
- Safety glasses and face shield: Always wear when cutting FRP — fiberglass dust and fragments can cause eye irritation.
- Respiratory protection: Use an N95 or P100 respirator when sawing or drilling FRP. The fine fiberglass dust can irritate the respiratory tract.
- Cut-resistant gloves: FRP edges can be sharp after cutting. Wear heavy-duty work gloves when handling panels.
- Long sleeves and pants: Cover exposed skin to avoid fiberglass itch from dust contact.
- Steel-toe boots: Protect feet from dropped panels or tools.
- Hard hat: Required on all construction sites with overhead work.
- Fall protection: For elevated installations above 6 feet, use guardrails, safety harnesses, and lanyards.
Safe Work Practices
- Ventilation: When cutting indoors or in confined spaces, use dust extraction systems and ensure adequate ventilation. Fiberglass dust is not toxic but can be a respiratory irritant.
- Fire safety: While FRP is inherently flame-retardant in most formulations, keep a fire extinguisher nearby when using power tools near combustible materials.
- Lifting techniques: FRP panels are lighter than steel but can still be awkward to carry. Use proper lifting technique (lift with your legs, not your back) and get assistance for panels longer than 8 feet.
- Tool safety: Ensure all power tools are properly guarded. Carbide-tipped blades can bind in FRP — maintain a firm grip and steady feed rate.
- Weather awareness: Do not install panels in wet or icy conditions. FRP surfaces become slippery when wet, and handling panels in high winds is dangerous.
- Edge protection: Cover or pad sharp FRP edges during transport and handling to prevent cuts.
Site Safety Checklist
Before beginning installation each day, run through this checklist:
- All crew members wearing required PPE
- Work area clear of tripping hazards
- Tools and equipment in good working condition
- First aid kit accessible
- Fire extinguisher available
- Emergency contact numbers posted
- Fall protection systems inspected (if applicable)
Post-Installation Inspection and Maintenance
Once the FRP walkway platform installation is complete, a thorough inspection ensures the structure is safe, compliant, and ready for use.
Immediate Post-Installation Inspection Checklist
- Visual inspection: Walk the entire platform and examine every panel, joint, and connection. Look for cracks, chips, delamination, or other damage that may have occurred during installation.
- Fastener check: Verify all bolts, clips, and fasteners are present and torqued to specification. Use a torque wrench on a sampling of fasteners (at least 10% of total) to confirm proper tightness.
- Load testing: If required by the project specifications, conduct a load test by placing the design live load on the platform and measuring deflection. Deflection should not exceed L/200 (span divided by 200) for pedestrian walkways.
- Handrail integrity: Apply a 200-pound lateral load to the top rail at several points to verify the handrail system meets OSHA strength requirements. The rail should deflect no more than 3 inches under load.
- Expansion gap verification: Confirm that 1/4-inch gaps exist between all adjacent panels for thermal expansion and drainage.
- Slip resistance: Test the walking surface under both dry and wet conditions to ensure adequate slip resistance.
- Level check: Use a 6-foot level placed at multiple locations across the platform. Any ponding water or dips greater than 1/4 inch indicate a drainage or support issue.
Long-Term Maintenance Guidelines
FRP walkway platforms require minimal maintenance, but periodic inspections extend service life:
- Quarterly inspections: Check for loose fasteners, damaged panels, or signs of UV degradation (chalking or color fading).
- Annual cleaning: Wash the platform with mild soap and water. Avoid harsh chemicals or pressure washing at close range, which can damage the resin surface.
- UV protection: If the platform is exposed to direct sunlight, consider applying a UV-resistant coating every 3–5 years to prevent surface degradation.
- Immediate repairs: Replace any cracked or damaged panels promptly. Small cracks can be repaired with epoxy resin, but severely damaged panels should be replaced entirely.
- Snow and ice removal: Use plastic shovels or de-icing chemicals that are compatible with FRP. Avoid metal scraping tools that can gouge the surface.
With proper installation and routine maintenance, an FRP walkway platform can provide 20+ years of reliable service in most environments.
Conclusion
Installing an FRP walkway platform is a manageable project that delivers long-lasting, corrosion-resistant access for decades. By following this FRP walkway platform installation guide, you can ensure a safe, structurally sound result that meets all applicable standards.
To recap the key takeaways:
- Prepare thoroughly: Accurate site measurements, proper foundation work, and a complete materials list prevent costly mid-project delays.
- Use the right tools: Carbide-tipped cutting tools, stainless steel fasteners, and proper safety equipment are non-negotiable.
- Follow the sequence: Support structure → grating panels → fastening → handrails. Do not skip steps or rush the process.
- Prioritize safety: Proper PPE, fall protection for elevated work, and safe handling practices protect your crew throughout the installation.
- Inspect before use: A comprehensive post-installation inspection catches any issues before the platform goes into service.
Whether you choose a complete frp walkway platform kit for simplicity or custom components for a unique application, the installation principles remain the same. For complex installations or when in doubt about any step, consult the manufacturer technical support team or engage a certified FRP installer.
For more information on FRP walkway products, design considerations, and pricing, explore our other guides or contact our engineering team for project-specific recommendations.