Introduction
When it comes to building safe, durable, and corrosion-resistant walkways on oil rigs, production platforms, and floating facilities, the FRP offshore platform grating installation method has become the industry standard. Fiber-reinforced polymer (FRP) grating offers a lightweight yet exceptionally strong alternative to traditional steel grating — but getting it right on the job site requires a clear, step-by-step process. Unlike steel, FRP grating demands specific handling, cutting techniques, and fastening systems to deliver its full service life in harsh marine environments.
This guide walks you through every phase of installing FRP grating on an offshore platform, from pre-installation planning and tool selection to final inspection and load testing. Whether you are a project engineer, an EPC contractor, or an offshore maintenance supervisor, following this FRP offshore platform grating installation method will help you achieve a secure, code-compliant installation that stands up to decades of salt spray, wave impact, and heavy foot traffic.
We also cover the key differences between FRP and steel grating installation, typical project timelines, budget considerations, and the most common on-site mistakes that can compromise safety and longevity. By the end, you will have a complete understanding of how to install FRP grating on an offshore platform the right way — the first time.
Understanding FRP Offshore Platform Grating
What Is FRP Grating for Offshore Platforms?
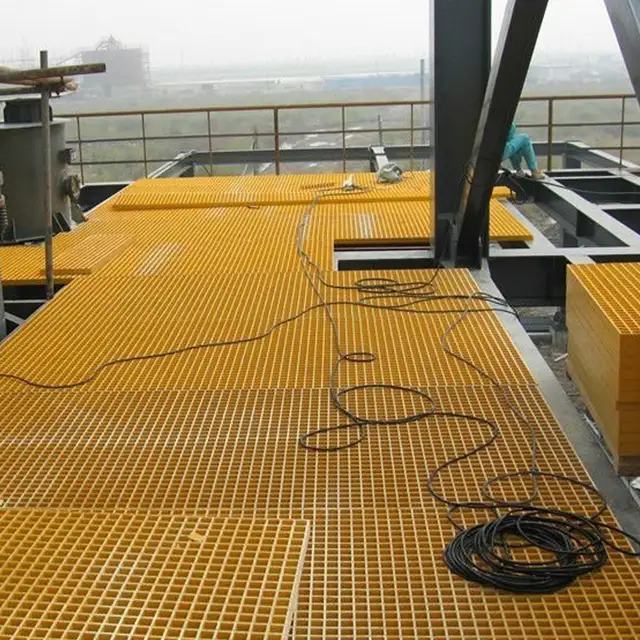
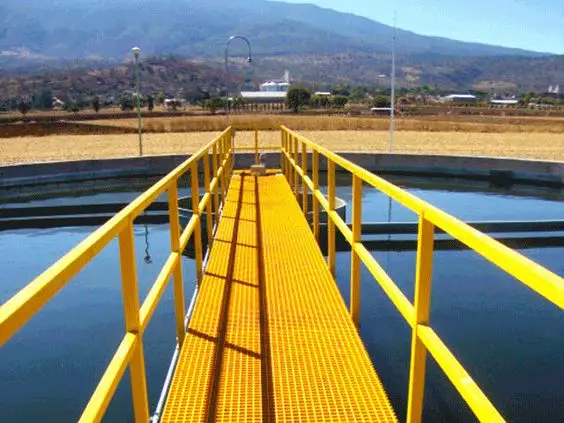
FRP (fiber-reinforced polymer) grating is a composite material made from thermosetting resin reinforced with glass fibers, formed into a grid-panel structure. It is manufactured through a pultrusion or compression molding process, producing panels that are lightweight, corrosion-proof, and non-conductive. On offshore platforms, FRP grating is used for walkways, mezzanine floors, stair treads, helideck platforms, and equipment access areas where exposure to seawater, chemicals, and UV radiation is constant.
Unlike steel grating, which rusts and requires heavy galvanization, FRP offshore platform grating is inherently resistant to marine corrosion throughout its entire cross-section — not just on the surface. This makes it a preferred choice for offshore topside structures where maintenance access is limited and replacement costs are high.
Load Capacity Specifications
One of the most critical factors in any offshore installation is understanding the FRP offshore platform grating load capacity specs. FRP grating is available in multiple series and resin systems to match specific load requirements:
| Grating Series | Deflection at 200 kg (4 ft span) | Typical Application |
|---|---|---|
| Standard molded grating (1" thick) | 0.12" – 0.18" | Light pedestrian walkways |
| Heavy-duty molded (1.5" thick) | 0.08" – 0.12" | Equipment platforms, main walkways |
| Pultruded I-bar grating (2" deep) | 0.05" – 0.10" | High-traffic areas, helideck access |
Designers must consider concentrated load (point load from a worker's heel or dropped tool), uniform load (snow accumulation or personnel crowding), and impact load (equipment being set down). Always consult the manufacturer's load tables and factor in a safety margin of 1.5x to 2x the expected maximum load for offshore environments. These FRP offshore platform grating load capacity specs directly influence which grating series is selected for each zone of the platform — pedestrian pathways, equipment laydown areas, and emergency escape routes each have different load requirements.
Advantages Over Steel Offshore Grating
When comparing FRP offshore grating vs steel offshore grating, the differences in installation difficulty and long-term performance are striking:
- Weight: FRP grating weighs about 60–70% less than an equivalent steel grating panel, making manual handling on offshore platforms much safer and faster.
- Corrosion resistance: No need for hot-dip galvanizing or periodic painting. FRP does not rust, pit, or spall in saltwater environments.
- Electrical and thermal non-conductivity: FRP is non-conductive and non-sparking, reducing risk in electrical work areas and gas-exposed zones.
- Ease of modification: FRP panels can be cut on-site with standard carbide-tipped tools, while steel requires plasma cutting or grinding.
- Maintenance savings: Over a 20-year service life, FRP requires virtually no protective coating maintenance, whereas steel platforms may need 3–5 recoating cycles in the same period.
Preparation for FRP Offshore Platform Grating Installation
Before any grating panel is lifted onto the platform, thorough preparation ensures the installation proceeds safely, on schedule, and to specification. Proper planning reduces rework, material waste, and on-site accidents — all of which are costly when working offshore.
Site Assessment and Planning
Begin with a detailed walk-down of the areas where FRP grating will be installed. Measure all openings accurately, noting cutouts for pipe penetrations, cable trays, structural columns, and equipment bases. Pay special attention to:
- Support beam spacing: Verify that the structural steel supports match the grating's design span. Maximum recommended support spacing for standard FRP grating is typically 24" to 30" on center for pedestrian loads.
- Anchoring points: Identify where clips, hold-down fasteners, or through-bolts will be attached. Existing steel support flanges should be clean, flat, and free of burrs or weld splatter.
- Access constraints: Note areas where crane or personnel access is limited, such as under-deck spaces and tight corners around equipment. These may require pre-cut panels delivered to the platform ready for drop-in installation.
- Environmental conditions: Check weather forecasts. FRP grating installation should not proceed in high winds (above 20 knots), heavy rain, or lightning-risk conditions.
Required Tools and Equipment
A properly equipped crew makes the difference between a smooth install and a frustrating one. Here is the complete list of tools needed for FRP offshore platform grating installation:
- Cutting tools: Carbide-tipped circular saw blades (for panel cutting), jigsaw with fine-tooth blade (for cutouts), and hand grinder with diamond wheel (for edge finishing). Avoid abrasive cutting wheels — they generate heat that can melt the resin.
- Drilling tools: Electric or pneumatic drill with carbide-tipped drill bits. Standard HSS bits dull quickly on FRP composite.
- Fastening hardware: FRP-compatible clips (stainless steel or nylon), saddle clips, grommets, hex bolts, washers, and lock nuts. Never use plain carbon steel fasteners — they will corrode and stain the grating.
- Measuring and layout: Tape measures, chalk lines, combination squares, and marking pens (not permanent markers, which can stain the resin).
- Lifting and handling: Crane or hoist with spreader bar (for large panels), lifting straps (avoid chains which can damage edges), and vacuum lifters for smooth surfaces.
- Safety equipment: Full fall protection harnesses with double lanyards, hard hats, safety glasses, cut-resistant gloves, steel-toed boots, and hearing protection.
- Miscellaneous: Rubber mallets (for gentle panel alignment), shims (for leveling), anti-seize compound (for stainless fasteners), and a portable vacuum system (for FRP dust control).
Step-by-Step FRP Offshore Platform Grating Installation Method
This is the core of the FRP offshore platform grating installation method. Follow these five steps in sequence for a professional, code-compliant result. The entire process is designed to be performed by a four-person crew with a crane operator.
Step 1: Measuring and Cutting Panels
Measure each opening twice and transfer dimensions to the FRP panel. Cut the grating with a carbide-tipped circular saw — always cut with the finished side up to minimize edge chipping. For irregular cutouts around pipes or structural members, use a jigsaw with a fine-tooth carbide blade. De-burr all cut edges with a file or light sanding to remove any sharp glass fibers. Wear a dust mask — FRP dust is a respiratory irritant.
Pre-drill fastener holes at marked locations using a carbide-tipped bit. Drill at a low RPM with steady pressure — forcing the bit can cause delamination. Countersink holes slightly if using flat-head fasteners.
Step 2: Positioning and Aligning the Grating
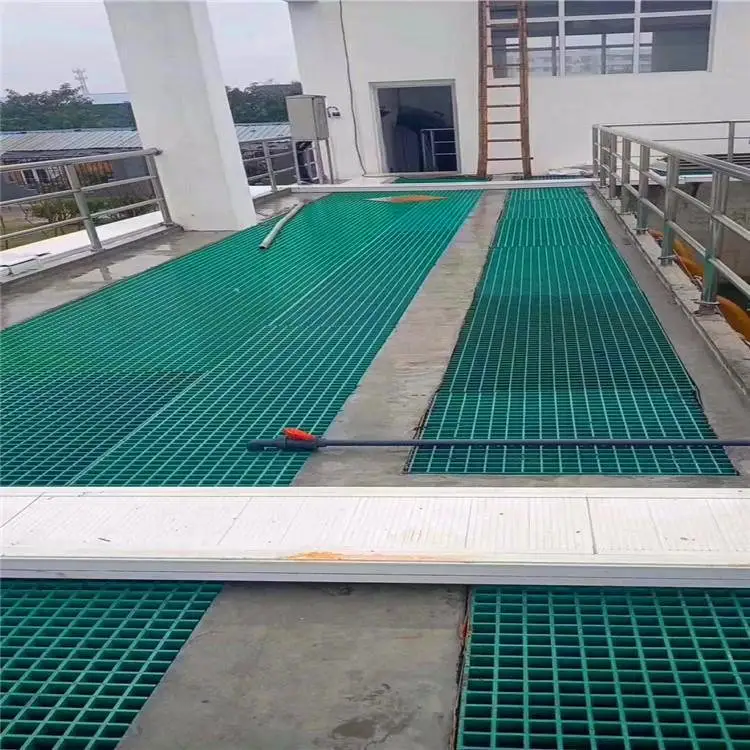
Lift pre-cut panels into position using lifting straps and a spreader bar to avoid edge damage. Set the panel onto the support beams, ensuring 1/4" to 1/2" expansion gap between adjacent panels and 1/2" gap at fixed structures. FRP expands and contracts with temperature changes, so these gaps are essential — do not force panels tightly together.
Align the grating so that the load-bearing bars run perpendicular to the support beams for maximum strength. Use a rubber mallet to gently tap panels into alignment — never a steel hammer, which can crack the composite.
Step 3: Securing with Clips and Fasteners
Secure each panel at every support beam intersection using FRP-compatible clips. The standard pattern is two clips per bearing bar at each support, with clips staggered on alternating bars. Use stainless steel saddle clips for grating installed in high-traffic pedestrian walkways, and nylon wedge-lock clips for areas subject to vibration. All fasteners should be torqued to manufacturer specifications — typically 8–12 ft-lbs — to avoid crushing the composite material.
For panels in safety-critical locations such as helideck access routes or emergency egress paths, install through-bolts with large-diameter washers on both sides to distribute the clamping load.
Step 4: Installing Non-Slip Surfaces
Offshore environments demand excellent traction. Most FRP grating products come with non slip FRP grating for offshore platforms surfaces already factory-applied: either a grit-embedded top surface (silica or aluminum oxide) or a molded textured pattern. If the factory grit has been cut through during trimming, reapply a bead of epoxy grit along the cut edge. For stair treads and sloped walkways, consider an additional layer of adhesive-backed anti-skid tape or a field-applied epoxy aggregate coating.
Keep the grating surface clean of grease, oil, and debris throughout installation. Even temporary contamination can compromise long-term slip resistance. When ordering material for the project, always specify non slip FRP grating for offshore platforms with the correct grit grade — coarse aluminum oxide (60–80 mesh) is the standard for oil- and water-exposed offshore decks.
Step 5: Final Inspection and Load Testing
Once all panels are installed and fastened, conduct a systematic inspection:
- Visual check: Look for cracked panels, chipped edges, loose fasteners, or gaps wider than the specified 1/2".
- Fastener torque: Spot-check 10% of all clips and bolts with a torque wrench. Re-tighten any that are below spec.
- Load test: Apply a 200 kg (440 lb) concentrated load at the center of the longest unsupported span. Measure deflection with a straightedge — it should not exceed the manufacturer's published value for that span and series. For high-traffic zones, conduct a uniform load test of 500 kg/m².
- Walk test: Have a crew member walk every section of the installed grating. Listen for rattling (loose clips), excessive vibration (insufficient fasteners), or noticeable deflection (undersized grating for the span).
Document all findings in the project's quality control report. If any deficiencies are found, correct them before declaring the installation complete.
Safety Requirements for Installing FRP Grating Offshore
Working on an offshore platform presents unique hazards. The safety requirements for installing FRP grating offshore go beyond standard construction site protocols. Here are the essential safety measures every crew must follow:
- Fall protection: All personnel working at heights above 1.8 meters (6 feet) must wear a full-body harness with a double-lanyard fall arrest system attached to a certified anchor point. During grating installation, open floor openings must be covered or barricaded at all times — never leave an unguarded hole overnight.
- Personal protective equipment (PPE): Minimum PPE includes hard hat with chin strap (wind can blow hats off platforms), safety glasses with side shields, cut-resistant gloves (FRP edges are sharp), steel-toed boots with non-slip soles, and hearing protection when cutting or grinding.
- FRP dust control: Cutting FRP generates fine glass-fiber dust that can irritate skin, eyes, and lungs. Use a portable HEPA vacuum attached to the cutting tool where possible. All workers in the cutting area must wear N95 or P100 respirators.
- Manual handling: A standard 4' x 8' FRP grating panel weighs 50–100 pounds depending on thickness — light enough for two workers but heavy enough to cause back injuries if lifted improperly. Use mechanical lifting aids for panels larger than 4' x 4'. Train the crew on proper lifting technique: bend at the knees, keep the back straight, and never twist while carrying.
- Fire safety: FRP grating is combustible. Keep fire extinguishers (Class A and Class B) within 15 meters of any cutting or grinding operation. Do not use cutting methods that produce sparks near gas-handling equipment — many FRP grating products meet Class 1 fire rating but the resin can still ignite if exposed to an open flame.
- Weather monitoring: Designate a safety watch whose job is to monitor wind speed and lightning risk. Stop all work if wind exceeds 20 knots (panels can become sail-like) or if lightning is detected within 10 nautical miles.
- Communication: Establish clear hand signals or radio communication between the crane operator, the signal person, and the installation crew. A pre-lift briefing should be conducted before every panel lift.
Document all safety briefings and toolbox talks in the platform's safety log. Offshore regulatory bodies (such as OSHA, UK HSE, or NOPSEMA depending on jurisdiction) require written records of safety compliance during installation work.
Installation Time and Cost Considerations
Project managers and procurement teams often ask: How long does it take to install FRP grating on an offshore platform? and How much does FRP offshore platform grating installation cost? While every platform is different, here are realistic benchmarks based on standard project data.
Installation Time
The installation speed depends on panel size, complexity of cutouts, crew experience, and weather interruptions. For a typical installation by a four-person crew:
| Job Type | Installation Rate | Notes |
|---|---|---|
| Simple rectangular spans, no cutouts | 30–40 ft² per person-hour | Fastest scenario — large uninterrupted areas |
| Moderate complexity, pipe penetrations | 20–25 ft² per person-hour | Each cutout adds 5–10 minutes |
| High complexity, tight corners, multiple levels | 10–15 ft² per person-hour | Stair treads and irregular areas slow progress |
A 5,000 ft² main deck installation typically takes 3–5 working days with a four-person crew, assuming good weather and all panels pre-cut to size. Factor in 1–2 additional days for staging, preparation, and final inspection.
Cost Considerations
The cost of FRP offshore platform grating installation breaks down into three main components:
- Material cost: FRP grating panels typically range from $25 to $55 per square foot depending on resin type (vinyl ester vs. polyester), thickness, fire rating, and UV protection. Heavy-duty and offshore-grade panels are at the higher end of the range.
- Fasteners and accessories: Clips, bolts, washers, and edge trim add $3–$8 per square foot. Stainless steel hardware costs more but is essential for offshore environments.
- Labor and logistics: Offshore installation labor including crew transport, platform accommodation, and standby safety vessels can add $15–$30 per square foot. This varies significantly by platform location — North Sea installations are typically more expensive than Gulf of Mexico installations due to logistics.
Total installed cost for FRP offshore platform grating typically falls between $45 and $90 per square foot. While this may seem higher than steel grating material alone ($15–$25/ft² for steel), remember that steel requires galvanization ($5–$10/ft²) and periodic maintenance painting ($8–$15/ft² every 3–5 years). Over a 20-year lifecycle, FRP is almost always the lower-cost option.
Common Installation Mistakes to Avoid
Even experienced crews can make mistakes when they treat FRP grating like steel grating. Here are the most frequent errors and how to avoid them when executing the FRP offshore platform grating installation method:
- No expansion gaps: The #1 installation mistake. FRP grating expands and contracts with temperature changes — up to 0.01" per foot per 30°F change. Installing panels tight against each other or against structural steel causes buckling, delamination, and fastener pull-out. Always leave the recommended 1/4" to 1/2" gap. Use plastic shims during installation to maintain consistent spacing, then remove them after fastening.
- Using the wrong cutting tools: Abrasive cutoff wheels and standard steel-cutting blades generate heat that melts the resin matrix, creating weak, frayed edges. Always use carbide-tipped blades designed for composite materials. Cut at a moderate feed rate — not too fast (burns the resin) and not too slow (fraying).
- Over-tightening fasteners: FRP is not steel — it compresses under clamping force. Over-tightened bolts crush the composite around the hole, reducing pull-through strength by 40–60%. Use a torque wrench set to 8–12 ft-lbs and never exceed the manufacturer's maximum. Use large-diameter washers to distribute clamping force.
- Mixing incompatible metals: Installing carbon steel or plain steel fasteners on FRP grating in a saltwater environment creates galvanic corrosion cells. The steel corrodes rapidly, staining the FRP and creating weak attachment points. Always use 316 stainless steel or nylon/composite hardware in offshore installations.
- Insufficient support bearing: FRP grating must bear on structural supports by at least 1" (25 mm) at each end. If panels are cut slightly short (common when trying to fit around obstructions), the reduced bearing area can lead to edge failure under load. Never accept less than full bearing.
- Skipping the walk test: Some crews finish fastening and call the job done without walking every panel. A loose clip, a cracked edge from a dropped panel, or a section that was set slightly high against the adjacent panel will quickly be found — but only if someone walks the grating. Do a full walking inspection before demobilizing the installation crew.
- Ignoring load direction: Pultruded FRP grating has strong and weak axes. The load-bearing bars (I-beams) must run perpendicular to the supporting beams. Installing panels with the bars parallel to the supports drastically reduces load capacity — a dangerous and potentially catastrophic error.
Most of these mistakes are preventable with proper crew training and a pre-installation quality control checklist. Take the time to review these common pitfalls with your installation team before the first panel goes down.
Conclusion
Installing FRP grating on offshore platforms is a straightforward process when you follow a proven FRP offshore platform grating installation method. The key takeaways from this guide are:
- Prepare thoroughly: Measure twice, verify support beam spacing, and assemble the right tools — especially carbide-tipped cutting blades and stainless steel or nylon fasteners.
- Follow the five-step process: Cut → Position → Secure → Finish → Inspect. Do not skip steps, and never combine them in a way that sacrifices quality.
- Prioritize safety: FRP installation offshore requires fall protection, dust control, proper lifting techniques, and strict weather monitoring. Safety is not optional — it is a regulatory and ethical requirement.
- Allow expansion gaps: This single detail prevents more post-installation failures than any other. FRP needs room to expand and contract without restraint.
- Respect the material: FRP is not steel. It is lighter, stronger per pound, and far more corrosion-resistant — but it demands different handling, cutting, and fastening techniques. Treat it as the engineered composite it is, and it will deliver decades of reliable service.
Whether you are comparing FRP offshore grating vs steel offshore grating for a new-build platform or replacing corroded steel walkways on an existing facility, understanding the correct installation method is your first step toward a safe, long-lasting platform surface. Consult your FRP manufacturer's installation manual for product-specific instructions, and never hesitate to request on-site technical support from the supplier — most reputable FRP manufacturers offer installation training and field supervision for offshore projects.
For detailed load tables, product datasheets, and installation videos specific to your grating series, contact your FRP supplier or visit their technical resource center. A properly installed FRP grating system will outperform steel in the offshore environment year after year, cutting maintenance costs and improving safety for the platform crew.